
In This Article
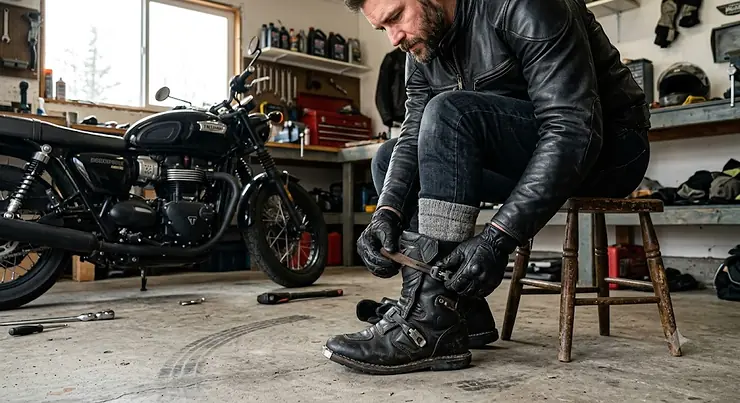
You roll to a stop, plant your foot on the pavement, and feel it again — that little upward slide inside your boot, like your heel has its own agenda. It is not your imagination, and it is not just an annoying quirk you have to live with. A motorcycle boots heel too loose solution usually comes down to one of three things: the boot is genuinely too big, the internal volume around your heel and ankle is wrong for your foot shape, or the closure system simply is not being used to its full potential. What is a loose motorcycle boot heel? It happens when your heel lifts or slides inside the boot shaft during walking or shifting, usually because of excess internal volume, a worn liner, or an under-tightened closure, and it can quietly undermine both comfort and control.
This matters more on a motorcycle than it would in a pair of everyday sneakers. As Wikipedia’s overview of motorcycle boots explains, this footwear is built with energy-absorbing padding and reinforced materials specifically to protect your feet, ankles, and legs in a crash, so a heel that floats around inside the boot does not just hurt comfort, it can compromise how that protective structure sits against your body. A heel that floats around inside your boot also means less precise feedback when you are searching for the shifter, more fatigue on longer rides, and a higher chance of blisters by the time you pull into the driveway. Reviewers across forums and gear shops repeatedly flag heel slip as one of the most common complaints with otherwise well-loved boots, especially in the first few months of ownership before the leather has settled.
The good news: this is one of the most fixable problems in motorcycling. Whether you are dealing with a brand-new pair of touring boots that still feel cavernous around the ankle, or a beloved old pair that has stretched out after a few summers of hard use, there are tested, affordable ways to lock your heel in place again. We will walk through real products, honest comparisons, and practical troubleshooting so you can ride without thinking about your feet for once.
Quick Comparison Table: Heel Slip Fixes at a Glance
| Fix Type | Best For | Price Range (CAD) | Difficulty |
|---|---|---|---|
| Adhesive heel grips | Mild to moderate slip, quick fix | Under C$25 | Easy |
| Full insole replacement | Volume mismatch, arch support | C$45-C$75 | Easy |
| Moleskin / friction pads | Hot spots, pressure points | Under C$20 | Easy |
| Thicker riding socks | Minor gaps, seasonal tightening | Under C$30 | Easy |
| Professional boot stretching | Width or width-related pinching | C$30-C$60 (service) | Moderate |
A quick scan of this table tells the real story: most heel-slip problems do not need an expensive overhaul, they need the right C$20-C$75 fix matched to the actual cause. Riders dealing with general looseness across the whole foot tend to get the most mileage from a full insole swap, since it changes internal volume everywhere at once rather than just patching one spot. If the issue is isolated purely to the heel cup with everything else fitting fine, adhesive heel grips solve it faster and cheaper. Boot stretching services are worth booking only when the problem is width, not heel volume, since stretching a boot does nothing to fix a heel that is simply too roomy front-to-back.
💬 Just one click — help others make better buying decisions too! 😊
Top 7 Motorcycle Boot Heel-Fit Products: Expert Analysis
This lineup covers the realistic toolkit Canadian riders reach for when a heel won’t stay locked down — from a C$10 adhesive pad to a full insole swap. We have grouped budget, mid-range, and premium picks, and every product here is something you can actually find for sale, not a generic placeholder.
1. Dr.Foot Self-Adhesive Heel Cushion Inserts — cheapest true heel-lock fix
These small, contoured pads stick directly inside the heel cup of your boot and are the fastest entry point into solving heel slip. The micro-suede top layer adds grip against your sock while the foam underneath fills dead space behind the ankle bone. Each pad measures roughly 3.3 by 1.4 inches, with a double-sided adhesive backing rated to resist peeling under daily wear. Based on the spec comparison with bulkier insole-style fixes, this is the right call for boots that fit well everywhere except a small gap right at the heel cup — trying to solve a whole-boot fit problem with a localized pad will just shift the pressure elsewhere. Reviewers consistently report that the pads hold up well for weeks of regular use before the adhesive starts to weaken, though several mention reapplying after exposure to heavy moisture or sweat. What most buyers overlook is that surface prep matters: wiping the boot’s interior leather or lining with rubbing alcohol before applying noticeably extends how long the bond lasts.
✅ Genuinely cheap entry point for a common problem
✅ No tools or boot modification required
✅ Comes in multi-packs so both boots and spares are covered
❌ Adhesive can weaken faster in hot, sweaty conditions
❌ Only addresses heel volume, not toe box or instep fit At around C$10-C$18 for a multi-pack, this is the lowest-risk first move for anyone whose heel slip is mild to moderate, and it pairs well with other fixes on this list if one pad alone is not enough.
2. Pedag Stop Suede Leather Heel Grips — best natural-material option for leather boots
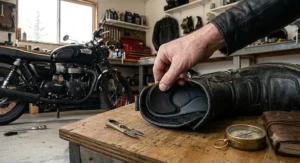
Pedag’s heel grips use a German-made suede construction rather than synthetic foam, which means they compress and mold to the heel shape over time instead of staying rigid. The suede surface also breathes better against bare skin or thin socks than plastic-backed alternatives. On paper this means a slightly slower break-in than a foam pad, but a more contoured, natural fit once it settles. Reviewers in online forums frequently note that these grips work well for a half-size adjustment but will not compensate for a boot that runs a full size too large — a distinction worth taking seriously before you buy. Based on the spec comparison, the suede surface is the standout reason to choose this over a synthetic competitor if your boots already have a leather lining, since the materials age and flex similarly.
✅ Premium suede feels more natural against skin
✅ Breathable, reducing the sweat buildup synthetic pads can cause
✅ Reusable and repositionable without losing grip
❌ Higher price per pair than basic foam pads
❌ Will not correct anything beyond a minor size gap Pricing sits in the C$15-C$25 range per pair, putting it solidly mid-pack — a reasonable upgrade if you have sensitive skin or simply prefer natural materials against your foot.
3. Makryn Premium Heel Pads Inserts — best dual-cushion design for active riders
Makryn’s set stands out because it ships with two different pad styles in one package: a standard contour grip and an extended-length pad that runs further down to support the underside of the heel, not just the back of it. The blend of silicone, foam, and breathable mesh is aimed at riders who need both slip prevention and genuine cushioning, which matters if your boots are stiff new leather rather than broken-in. What most buyers overlook is that the extended pad variant is the one that actually helps with the “hollow” feeling some new touring boots have under the heel, not just the back-of-ankle slide. Aggregated review sentiment is mixed but leans positive: several users praise the dual-cushion concept directly, while a smaller number flag inconsistent adhesion on textile or treated leather linings, so it is worth checking your boot’s interior material before committing
✅ Two cushion styles solve two different problems at once
✅ Mesh backing stays breathable during long rides
✅ Works well in both stiff new boots and broken-in pairs
❌ Adhesion is reported as inconsistent on treated or textile linings
❌ Limited number of long-term reviews to confirm durability Expect to pay in the C$15-C$22 range, making this a smart mid-range pick if you want more than a single thin pad provides.
4. Superfeet All-Purpose Support High Arch Insoles (Green) — best whole-boot volume fix
Rather than patching one spot, this insole replaces the stock footbed entirely, which changes how your whole foot sits inside the boot. The deep, sculpted heel cup is the feature that matters most here: it physically cradles your heel rather than relying on adhesive friction, so it keeps working even after months of wear and repeated boot removal. The high-density closed-cell foam holds its shape far longer than the thin factory insole most motorcycle boots ship with, and the moisture-wicking top cover helps manage the sweat that builds up in a sealed, non-breathable boot shaft. Here’s what to weigh: these are trim-to-fit, so a small amount of careful cutting is required to match your exact boot size, which is a step some buyers skip and then blame the product for an imperfect fit. Reviewers consistently note that the deep heel cup specifically reduces that “foot swimming” feeling in roomier touring and adventure boots better than any adhesive pad can.
✅ Fixes overall internal volume, not just one pressure point
✅ Heel cup stays effective long after adhesive-based fixes wear out
✅ Doubles as genuine arch support for all-day comfort
❌ Requires trimming to size, adding a short setup step
❌ Thicker profile may tighten an already snug toe box Pricing typically runs C$45-C$60, positioning it as the mid-range workhorse fix for riders whose whole boot feels loose, not just the heel.
5. Superfeet Orange Insoles — best motorcycle-specific premium insole
Superfeet’s Orange model adds a re-engineered, higher-impact foam forefoot on top of the brand’s signature deep heel cup, and motorcycle gear retailers specifically market this version for riders because of how it behaves both on the pegs and walking around off the bike. The high-profile, narrow heel cup is firmer than the All-Purpose Green model, which translates to a more locked-in feel for riders who do a lot of walking in full gear — at a gas station, a rest stop, a parking lot — where stock motorcycle boot insoles tend to feel mushy and unsupportive. Based on the spec comparison with the Green model above, the trade-off is a firmer, less forgiving ride; riders with sensitive or flat feet may prefer the standard Green version instead. Industry reviewers researching insole performance for active footwear note that a deep, well-supported heel cup reduces foot fatigue more effectively than cushioning volume alone, which lines up with why Superfeet markets this model specifically for boots with removable factory insoles.
✅ Purpose-marketed for motorcycle boots by gear retailers
✅ Narrow, high-profile heel cup gives a notably locked-in feel
✅ Holds support and shape longer than factory foam insoles
❌ Firmer ride may not suit riders who prefer soft cushioning
❌ Premium price compared to basic insole alternatives Expect to pay in the C$55-C$75 range, the highest of the insole options here, but justified for riders who spend significant time both riding and walking in full boots.
6. Dr. Scholl’s Moleskin Padding Roll — best for pressure points, not just slip
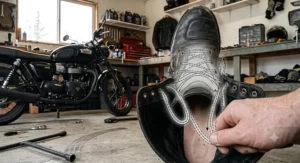
Moleskin solves a different problem than the heel grips above: instead of preventing your heel from moving, it cushions the spots where boot seams, ankle bones, or stiff leather edges create friction and hot spots, often the real source of pain riders mistake for a “loose boot” issue. The roll format (24 by 4.625 inches) means you cut exactly the shape and thickness you need, which beats pre-cut shapes when your pressure point sits in an unusual spot like the top of a buckle channel or the inside edge of a side zipper. Reviewers and podiatric sources consistently recommend applying it to the inside of the boot rather than directly over broken skin, since the strong adhesive can damage a blister if placed on top of it. What the spec sheet won’t tell you, but user reports suggest, is that doubling up a second layer over an already-cut piece works well for unusually deep pressure points without needing to buy a thicker specialty product.
✅ Solves friction and hot spots, a different issue than pure slip
✅ Cut-to-size roll format adapts to any odd-shaped pressure point
✅ Inexpensive and widely available at Canadian pharmacies
❌ Adhesive should never go directly over a blister or broken skin
❌ Needs reapplication more often than dedicated heel grips At roughly C$8-C$15 per roll, this is the cheapest item on the list and arguably the most versatile, since it tackles pain points heel grips cannot reach.
7. ENGO Blister Prevention Patches — best ultra-thin, long-lasting friction fix
ENGO patches take a different approach entirely: rather than adding padding to your skin, they stick to the inside of the boot itself and create an ultra-low-friction surface that lets your sock glide instead of catching and rubbing. Because the patches are extremely thin, they do not meaningfully change your boot’s internal volume the way a thick moleskin pad or heel grip can, which matters if your boots already fit snugly everywhere except one friction point. The manufacturer markets these as lasting the working life of the shoe in that location, a claim echoed by several long-term user reports who note the patches survived months of regular wear without peeling. Based on the spec comparison with traditional moleskin, the trade-off is clear: ENGO solves friction without adding bulk, while moleskin adds cushioning at the cost of slightly more internal volume — the right choice depends on whether your problem is pure friction or pressure plus volume.
✅ Ultra-thin profile does not alter overall boot fit
✅ Designed to last significantly longer than disposable moleskin
✅ Reduces friction at the source rather than just cushioning it
❌ Does not address heel volume or general looseness
❌ Premium price per patch compared to bulk moleskin rolls Pricing generally lands in the C$15-C$25 range for a small pack, making it a smart premium pick specifically for riders whose only issue is a recurring hot spot, not overall heel slip.
Practical Usage Guide: Fitting and Maintaining Your Fix
Getting any of the products above to actually work starts before you ever touch a tube of adhesive. Always fit and test with the same socks you ride in — preferably a midweight, moisture-wicking riding sock, since switching sock thickness later can undo a perfectly good fix. Clean and dry the inside of the boot where any adhesive product will sit; oils from leather conditioner or simple dust will shorten the life of any heel grip or moleskin pad dramatically. When applying heel grips, push your heel firmly into the back of the boot first, mark where the natural contact point sits, then apply the pad slightly higher than feels necessary, since most pads compress a few millimetres under body weight within the first few wears.
For insole swaps, trim conservatively. Trace your factory insole onto the new one before cutting, and remove slightly less material than the trace line suggests — you can always trim more, but you cannot add material back. In the first 30 days, recheck your fix after every few rides; adhesive-backed products shift slightly as they break in, and a five-minute readjustment early on prevents a slow slide back into the original problem. A common mistake is judging a fix after a single short ride; give any new insole or pad at least three or four real rides before deciding whether it has solved the issue, since leather and foam both need a settling-in period to reach their final shape.
Real-World Scenarios: Matching the Fix to the Rider
Picture a daily commuter riding a mid-size adventure bike through a Canadian city for 25 minutes each way, five days a week. Her boots fit well in the toe box but her heel lifts noticeably every time she stops at a light. For her situation, adhesive heel grips like the Dr.Foot or Pedag options make the most sense: the fix is fast, inexpensive, and matched to a localized problem rather than a whole-boot volume issue.
Now consider a touring rider planning a multi-day trip across the Rockies, spending hours both riding and walking around at fuel stops and viewpoints. His boots feel generally roomy throughout, not just at the heel, and his feet ache by the end of long days. A full insole swap, such as the Superfeet Orange, addresses both problems simultaneously by tightening overall volume while adding arch support for the walking portions of his trip.
Finally, picture a new rider who just bought her first pair of boots online without trying them on first. They fit well at the heel but a seam digs into her ankle bone on every ride. Her issue is not slip at all — it is a pressure point, which means moleskin or an ENGO patch is the correct tool, not a heel grip that would do nothing for her actual problem.
Troubleshooting Fit Issues: A Problem to Solution Guide
Problem: Heel lifts only when walking, not while riding. This usually points to excess volume around the ankle collar rather than the heel cup itself. A combination of a heel grip plus slightly thicker socks for off-bike walking often resolves it without affecting the snugger feel you get once your foot is braced against the footpeg.
Problem: Heel slip returns after a few weeks. Adhesive has likely worn down faster than expected, often from sweat or humidity. Clean the surface with rubbing alcohol, let it dry fully, and reapply; if the same spot keeps failing, switch to a more breathable mesh-backed product like the Makryn pads.
Problem: New pressure point appeared after adding a heel pad. Adding bulk to the heel cup sometimes pushes your foot slightly forward, creating new contact at the toe box or instep. Try a thinner pad, or pair a slim ENGO patch with a half-size adjustment instead of stacking thick foam.
Problem: Boot feels loose everywhere, not just the heel. A localized pad will not fix a true sizing problem. Move to a full insole replacement first, and consider a professional boot-stretching consultation only if the width, not the volume, is the actual culprit.
Problem: Heel grip won’t stick to a textile or treated leather lining. Some synthetic linings resist standard adhesives. Reviewers report better results switching to a stitched-in or thicker friction-based product like Pedag’s suede grips rather than a thin double-sided tape pad on these surfaces.
How to Choose a Heel-Lock Fix for Your Motorcycle Boots
- Identify whether the problem is slip or pressure. Slip means your heel moves up and down; pressure means a specific spot hurts. These need different products entirely.
- Check how much extra room actually exists. A finger-width gap behind the heel needs a different fix than a boot that is genuinely a half or full size too large.
- Consider your riding style. Commuters who walk in their boots regularly benefit more from full insole swaps than from spot pads. As FortNine’s breakdown of motorcycle boot safety features points out, a boot that fits properly and stays on your foot is the baseline requirement for any of its protective features to actually work in a crash.
- Match the material to your boot’s lining. Synthetic linings often hold adhesive less reliably than untreated leather.
- Budget for trial and error. Even reviewers with decades of riding experience often try two or three fixes before landing on the right one.
- Don’t ignore your socks. Sometimes the cheapest fix in this entire article is simply switching to a midweight riding sock instead of a thin dress sock.
- Reassess after a real ride, not a living-room test. Boots behave differently under load on the pegs than they do standing in your kitchen.
Common Mistakes When Fixing Loose Motorcycle Boots
The single most common mistake is over-correcting: stacking multiple thick pads at once instead of testing one fix at a time, which often creates new pressure points worse than the original slip. A close second is ignoring sock thickness entirely — riders will spend C$60 on insoles while still wearing the same thin cotton socks that contributed to the problem in the first place. Skipping surface prep before applying any adhesive product is another frequent error; dust, oils, and leather conditioner residue all shorten adhesive life dramatically. Finally, many riders judge a fix too early, deciding after a single ride that a product “doesn’t work” when foam and adhesive genuinely need a short break-in period to reach their final performance.
What to Expect: Real-World Performance After an Adjustment
On paper, a heel grip or insole swap sounds like it should solve the problem instantly, but real-world performance is gradual. Expect noticeable improvement within the first one or two rides, with the fix continuing to settle and conform over the following two to three weeks. Reviewers consistently describe the change as subtle rather than dramatic when the fix is well-matched to the problem — your foot should simply stop moving inside the boot, not feel suddenly squeezed or different. If a fix feels dramatically different the moment you put the boot on, that is often a sign it is either too thick for the actual gap or addressing the wrong problem altogether.
Aftermarket Fit Adjustments: What Actually Works
Beyond the products already covered, riders sometimes look at more permanent aftermarket fit adjustments for boots that are otherwise excellent but consistently loose. Professional boot stretching, typically offered by shoe repair shops and some motorcycle gear retailers, can address width-related discomfort but does little for heel volume specifically, since stretching widens the boot rather than filling empty space. Replacing a worn factory liner is another genuine aftermarket option for boots with a removable inner bootie, though it is less common and usually requires contacting the manufacturer directly for replacement parts. What most buyers overlook is that aftermarket adjustments work best as a last resort after simpler fixes like insoles and heel grips have already been tried, since modifying the boot itself is harder to reverse than removing a pad.
Sizing Remedies for a Heel That Won’t Stay Put
Sometimes the honest answer is that the boot is simply the wrong size, and no pad will fully fix that. A useful sizing remedy before resorting to fit modifications: try on boots later in the day when feet are naturally slightly swollen, and always wear the actual socks you plan to ride in. If you are between half sizes, sizing down combined with a thin heel grip generally produces a better long-term result than sizing up and trying to fill the extra volume with thick padding, since oversized boots compromise control in ways padding cannot fully correct. Reviewers in rider forums frequently report success after dropping a half size and adding a simple insole, rather than keeping the larger size and stacking multiple fixes.
Pressure Point Modification: Stretching, Punching, and Padding
When the issue is a specific pressure point rather than general slip, three approaches dominate. Padding, using moleskin or ENGO-style friction patches, is the fastest and lowest-risk option, ideal for a single recurring hot spot. Stretching, done by a professional with a boot stretcher and stretching spray, works for tight spots caused by leather that has not yet broken in, particularly around the ankle bone or instep. Punching, where a cobbler creates a small localized bubble in the leather over a specific bone prominence, is the most invasive option and generally reserved for persistent pain that padding and stretching have not resolved. Here’s what to weigh: padding adds material and slightly reduces internal volume, while stretching and punching remove material tension without changing the boot’s overall size, so the right choice depends on whether your boot is otherwise a good fit.
Comfort Enhancement Upgrades Worth Trying
Beyond direct heel-slip fixes, several smaller comfort enhancements compound nicely with the products covered above. Switching to seamless, midweight riding socks reduces friction independent of any pad or insole. Rotating between two pairs of boots, when financially possible, allows leather and foam to fully recover and air out between rides, which extends the working life of any adhesive-based fix. A light leather conditioner applied a few times per season keeps the boot’s upper supple, which in turn reduces the kind of stiff-leather pressure points that often get mistaken for sizing problems. None of these are dramatic fixes on their own, but reviewers and experienced riders alike note that the cumulative effect noticeably extends comfort on longer rides.
When Shin Guards Feel Uncomfortable: Fixing the Other Half of the Fit Puzzle
Heel slip rarely travels alone — many riders dealing with motorcycle boots shin guards uncomfortable against the lower leg are actually experiencing a related volume problem higher up the boot shaft. A rigid shin plate that was designed to protect against impact can dig into the leg if the calf area is too roomy and allows the plate to shift during riding. The fix mirrors the heel-slip approach: a thin layer of moleskin or foam padding along the inside edge of the shin guard channel reduces movement-related rubbing, while tightening the upper calf strap (most touring and adventure boots include one specifically for this) keeps the armour positioned correctly instead of sliding sideways. Based on the spec comparison between boot models, shin guards integrated directly into the boot’s structure tend to shift less than removable external plates, which is worth knowing if you are shopping for a new pair down the line rather than just patching an existing one. Moto Canada’s rider gear guide makes a similar point about footwear generally: proper fasteners and a secure fit matter as much as material choice, since a boot that shifts around undermines the protection it was designed to provide.
Safety and Regulations: Why Proper Boot Fit Matters in Canada
A poorly fitted boot is not just uncomfortable; it is a safety issue. According to Quebec’s road safety agency SAAQ, protective footwear that covers the ankle is part of the recommended motorcycle gear package, alongside a helmet, jacket, gloves, and pants, because lower-leg and ankle injuries remain among the most common outcomes in motorcycle crashes. Industry guidance from Canadian retailers echoes this: boots need to cover and protect your ankles and should have proper fasteners to stay on your feet, with laces secured so they don’t get caught in the motorcycle’s moving parts. A boot that constantly slips at the heel undermines exactly the kind of secure fit this guidance is built around — if your foot is not held firmly in place, the boot’s protective structure cannot do its job properly during a fall.
There is no single federal Canadian standard mandating motorcycle boot certification the way helmets are regulated provincially, but the European EN 13634 standard is widely referenced by manufacturers selling into the Canadian market, and Wikipedia’s overview of motorcycle boots notes that motorcycle boots are generally made from thick, heavy leather and may include energy-absorbing and load-spreading padding, metal, plastic, or composite materials to protect the rider’s feet, ankles, and legs in an accident. Fixing a loose heel is not just about comfort, in other words — it is part of making sure that protective structure stays where it is supposed to be when you need it most.
Frequently Asked Questions
❓ Why does my motorcycle boot heel slip even after breaking in?
❓ Are heel grips safe to use in motorcycle boots specifically?
❓ How long do adhesive heel pads last in riding boots?
❓ Can thicker socks alone fix a loose motorcycle boot heel?
❓ Should I get my motorcycle boots professionally stretched for heel slip?
Conclusion: Getting Your Heel Locked In for Good
A loose heel inside your motorcycle boots is one of those problems that feels minor until you are three hours into a ride and every stop reminds you it is still there. The fix rarely requires buying new boots outright. Most riders land on a solution somewhere in this lineup: a simple adhesive heel grip for mild slip, a full insole swap like the Superfeet options when the whole boot feels roomy, or a moleskin and ENGO combination when the real issue turns out to be friction rather than fit. The key is matching the product to the actual cause rather than reaching for the most expensive option first.
Give whatever you try a fair few rides before judging it, keep your socks consistent, and revisit the fix periodically as adhesive wears and leather continues to break in. Comfort on a motorcycle compounds — a heel that stays put means less fatigue, more focus on the road, and boots that finally feel like they were built for your foot instead of just close enough.
🔍 Ready to stop fighting your boots? Check current pricing on the fixes above before your next ride.
Recommended for You
- 7 Best Ventilated Boots for Alberta’s Summer Heat (Canada 2026)
- Best 7 Motorcycle Boots Ice Grip Sole for Canada (2026)
- Best Motorcycle Boots for Wide Feet 2026: Top 7 Picks for Canada
Disclaimer: This article contains affiliate links. As an Amazon Associate, I earn from qualifying purchases. If you purchase products through these links, we may earn a small commission at no additional cost to you.
✨ Found this helpful? Share it with your friends! 💬🤗
