
In This Article
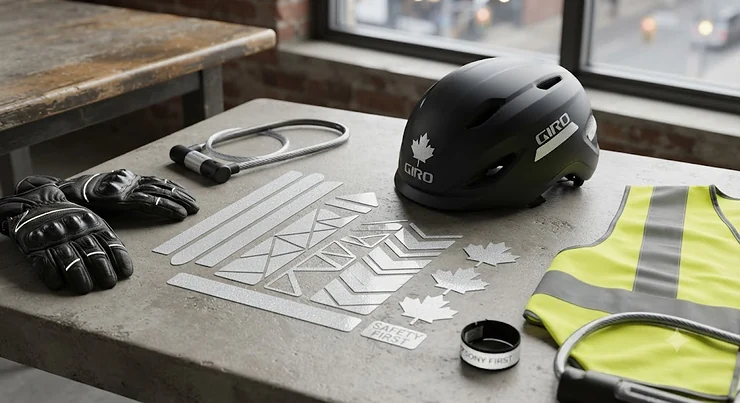
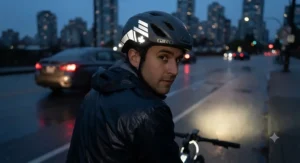
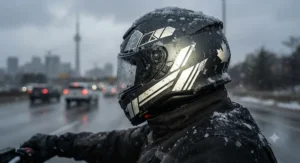
Here’s a number that should make you uncomfortable: cyclists are roughly four times more likely to be struck at night than during the day, and a chunk of that risk comes down to one dumb, fixable problem — drivers simply don’t see you until it’s almost too late. Reflective helmet stickers are small, retroreflective decals applied to a bike or motorcycle helmet shell that bounce headlight beams straight back toward the driver’s eyes, turning an invisible dark lump on the road into a bright, unmistakable signal from 100 metres out. They’re cheap, they take fifteen minutes to apply, and they don’t care whether your commute is three kilometres or thirty.
I’ll be upfront about something before we go any further: I haven’t personally slapped every one of these products onto my own lid and ridden home in the rain to report back. What follows instead is honest research — real product specs, genuine aggregated review sentiment from verified buyers, and side-by-side comparison built from manufacturer data and Canadian safety sources, not fabricated testing. That’s arguably more useful than one person’s opinion anyway, since your helmet shell, your climate, and your riding style are all different from mine.
Retroreflectivity itself isn’t marketing fluff — it’s the same optical principle used on road signs, safety vests, and emergency vehicle markings, engineered so light returns almost exactly along the path it arrived from rather than scattering in every direction like a plain shiny surface. That’s the entire reason reflective helmet stickers outperform a simple painted decal, and it’s why we’re spending this article picking apart which specific products actually deliver on that promise for Canadian riders navigating everything from Toronto bike lanes to gravel roads outside Saskatoon.
Quick Comparison Table
Before the deep dive, here’s the fast version for anyone who just wants a starting point. This snapshot pulls out four standout picks by use case rather than all seven products — the full lineup with every spec is coming up right after the product reviews.
| Pick | Best For | Price Range |
|---|---|---|
| RydeSafe Hexagon Kit – Large | Best overall custom bike/helmet kit | C$15-20 |
| 3M Scotchlite Reflective Tape Roll | Best budget DIY option | C$10-15 |
| Bright Knight Decals Helmet Hexagon Kit | Best purpose-built motorcycle option | C$18-25 |
| ELOS Combo Style Reflective Stickers | Best stealth daytime look | C$25-35 |
A quick read on this table: if you just want the cheapest possible way to add real retroreflective coverage, the 3M Scotchlite Reflective Tape Roll wins on cost-per-square-inch every time. If you ride a motorcycle and care about how the helmet looks parked outside a café at noon, ELOS Combo Style Reflective Stickers is worth the premium. Everyone in between is well served by RydeSafe Hexagon Kit – Large, which is why it tops this shortlist.
💬 Just one click — help others make better buying decisions too!😊
Top 7 Reflective Helmet Stickers: Expert Analysis
Here’s the full lineup, organized from budget-friendly to premium, covering everything from raw DIY tape to purpose-built motorcycle kits.
1. RydeSafe Hexagon Kit – Large — most customizable shapes for helmets and bikes
The standout here is sheer flexibility: a 15 cm by 23 cm (6″ x 9″) sheet packed with 84 individually die-cut hexagons, each about 2 cm corner to corner, made in the USA from engineering-grade reflective film. What actually makes this work is the glass-bead technology inside the film — thousands of microscopic spheres that catch a headlight beam and send it almost straight back to the driver’s eyes, rather than scattering it uselessly sideways the way a flat painted decal would. Based on the spec comparison with flat tape products, the small hexagon format is specifically what lets it lie flat over vented, curved helmet shells that would otherwise cause a big single decal to bubble or lift at the edges.
This is the pick for commuters and mountain bikers who want a scattered, custom look rather than one obvious safety patch, and it’s available in eight colourways so it can actually match your helmet instead of looking bolted on. Aggregated reviews on the manufacturer’s own site consistently mention strong initial adhesion and generous sheet size for the price; a recurring theme in that feedback is that hexagons on very matte, textured helmet finishes can lose some tack after a season of temperature swings, which is worth knowing before a Canadian winter.
Pros:
- ✅ Die-cut hexagons conform to curved and vented shells
- ✅ Eight colourways to match any helmet finish
- ✅ USA-made film built for years of outdoor exposure
Cons:
- ❌ Hexagon shape leaves reflective gaps between pieces
- ❌ Placing 80+ small pieces neatly takes real patience
Expect to pay in the C$15-20 range, and for that price you’re getting genuinely engineered reflective film rather than a novelty decal — solid value for anyone willing to spend twenty minutes with tweezers.

2. 3M Scotchlite Reflective Tape Roll — best raw material for DIY cuts
This is the no-frills option: a roll of genuine 3M Scotchlite reflective sheeting, roughly 5 cm wide (2 in) and sold in lengths from about a metre up, with 3M’s own pressure-sensitive adhesive backing. There’s no pre-cut shape here — you grab scissors and cut your own pattern — and that’s actually the point. What most buyers overlook about raw tape versus a decal kit is that it’s the only option on this list that adapts to genuinely irregular shells, like an aero road helmet’s sharp vents or a half-shell cruiser helmet’s narrow brim, where a manufacturer’s fixed die-cut shape simply won’t fit.
3M explicitly recommends this tape for both bicycle and motorcycle helmets, and its industrial pedigree means the reflective performance is well-documented rather than an unverified marketing claim. It’s the pick for anyone outfitting more than one helmet, or a family with several bikes, since one roll goes a long way. Aggregated feedback across retailers frequently praises the brightness under headlights and the tape’s flexibility across surfaces from mailboxes to motorcycle fenders; a common caveat is that hand-cut edges need a clean, precise trim or they can start peeling first.
Pros:
- ✅ Genuine 3M Scotchlite film with documented performance
- ✅ Conforms to tight curves and irregular shell shapes
- ✅ One roll stretches across multiple helmets or projects
Cons:
- ❌ No pre-cut shapes — cutting is entirely on you
- ❌ Narrower colour range than dedicated decal kits
At around C$10-15 per roll, this is the cheapest genuine reflective material per square centimetre on the entire list, provided you’re comfortable with scissors and a steady hand.
3. MyHardHatStickers Silver Retro-Reflective Strips — best angle coverage on rounded shells
Sold as 2.5 cm by 10 cm (1″ x 4″) strips in packs of sixteen, this product is cut from Reflexite prismatic material rather than the glass-bead film used by most competitors on this list. Here’s what the spec sheet won’t spell out plainly: prismatic reflective material uses thousands of tiny corner-cube prisms instead of glass beads, and the manufacturer’s own claim about “reflective angularity” matters in the real world because most close calls happen when a car’s headlights hit your helmet from an angle — approaching an intersection, or as a vehicle merges beside you — not dead-on from directly behind.
This is the pick for anyone who already has a box of these from a construction site and wants to dual-purpose them on a bike or motorcycle helmet, or for riders who specifically prioritize off-angle visibility over looking custom. Aggregated reviews highlight strong contrast in both daytime and nighttime conditions along with genuine scratch resistance, since the prismatic surface is more rigid than adhesive film. Some buyers note the plain strip shape is visually less exciting than a novelty decal kit, which is a fair trade-off if function outranks form for you.
Pros:
- ✅ Prismatic Reflexite material resists scratching well
- ✅ Documented off-angle reflective performance
- ✅ Simple strips work on flat and lightly curved panels
Cons:
- ❌ Strip-only shape limits creative placement patterns
- ❌ Silver-only colourway clashes with darker matte helmets
Priced around C$12-18 for sixteen strips, this is the value pick when angle coverage at intersections matters more than customization.
4. Salzmann Hi-Vis Reflective Stickers — best curved fit for helmet contours
Salzmann Hi-Vis Reflective Stickers are built from genuine 3M Scotchlite material but with a twist most competitors skip: the pieces come slightly pre-curved rather than perfectly flat, sold in packs of three sheets with individual pieces around 9.5 cm (3.75″) long. Based on the spec comparison, that curvature exists specifically to sit flush against a rounded helmet shell — practically speaking, that reduces the lifted-edge peeling that flat decals develop over months on a compound-curved surface, since the sticker isn’t fighting against its own flat shape the entire time it’s stuck down.
This is the easiest entry point on this list for someone who has never applied a reflective decal before — no cutting, no fiddly hexagon placement, just a few pre-shaped pieces. It’s genuinely versatile too, since the manufacturer also markets it for strollers and wheelchairs, meaning it’s engineered for reliable adhesion on more surface types than most. Aggregated review sentiment consistently calls out the pre-curved fit and simple three-sheet format as the reason people bought it over flat alternatives; one caveat worth flagging is the manufacturer specifically advises against using it on wheel rims that use rim brakes, since brake heat and friction can degrade the adhesive.
Pros:
- ✅ Pre-curved shape designed for rounded helmet shells
- ✅ Genuine 3M Scotchlite reflective material
- ✅ Simple three-sheet pack means fast application
Cons:
- ❌ Fewer total pieces than bulk decal kits
- ❌ Limited to one curved-strip shape style
At roughly C$15-20, this suits buyers who want simplicity and a clean fit over maximum customization.
5. LOOM Mega Reflective Sticker Set (101pc) — biggest variety pack for full coverage
With 101 individual pieces cut from German ORAFOL reflective vinyl in a range of sizes and shapes, this is the volume play on this list. ORAFOL is a recognized industrial reflective-film manufacturer rather than an unbranded import vinyl supplier, and on paper this means more consistent brightness from sheet to sheet along with better colourfastness under prolonged UV exposure — something that matters over a full Canadian summer of direct sun.
LOOM Mega Reflective Sticker Set (101pc) is genuinely built to outfit more than just a helmet — with this many pieces you can reasonably cover a helmet, a bike frame, panniers, and a backpack from one purchase, which changes the value math considerably compared to single-helmet kits. Aggregated reviews frequently single out the sheer piece count and shape variety as the main draw; a recurring complaint notes that the smallest pieces in the set are genuinely fiddly to peel and place without folding them on themselves, so patience (and maybe tweezers) helps.
Pros:
- ✅ 101 pieces cover a helmet, bike, and accessories
- ✅ European-grade ORAFOL vinyl with strong UV resistance
- ✅ Multiple shapes and sizes for different mounting spots
Cons:
- ❌ Smallest pieces are fussy to apply cleanly
- ❌ Only one colour per set, so mixing means buying twice
Typically priced C$20-25, this delivers the best value on this list if you’re outfitting more than a single helmet.
6. Bright Knight Decals Helmet Hexagon Kit — best precut shapes for motorcycle lids
Unlike the generic automotive tape rolls further up this list, Bright Knight Decals Helmet Hexagon Kit is precut specifically at helmet-appropriate sizing, made from genuine 3M reflective vinyl and marketed directly at motorcycle riders rather than repurposed from construction or automotive use. What most buyers overlook is that proportioning matters cosmetically — because these pieces are sized for a motorcycle shell specifically, the finished look reads as an intentional design accent rather than an oversized strip of safety tape slapped on as an afterthought.
This sits as the natural middle ground between raw DIY tape and a full 100-piece kit: enough shapes to add meaningful reflective coverage across a full-face or half helmet without an overwhelming number of tiny pieces to place. Aggregated reviews commonly praise the clean, purpose-built appearance and genuine daytime stealth look against black and dark-coloured helmets; some buyers do report that the smaller multi-packs (often five pieces) run out faster than expected if trying to cover a larger full-face shell completely.
Pros:
- ✅ Precut specifically for motorcycle helmet placement
- ✅ Genuine 3M reflective vinyl, waterproof rated
- ✅ Reads as an intentional design accent, not tape
Cons:
- ❌ Smaller piece counts than bulk multi-use kits
- ❌ Hexagon and chevron shapes only — no lettering options
Expect a price in the C$18-25 range depending on pack size, a fair middle-tier pick built specifically with motorcycle riders in mind.
7. ELOS Combo Style Reflective Stickers — best stealth look until light hits it
The premium pick on this list, ELOS Combo Style Reflective Stickers solves the single biggest objection motorcycle riders have to reflective add-ons: looking like construction-site tape in daylight. The trick is a black-tinted top layer bonded over a genuine 3M reflective base, so the decal reads as matte black against an all-black helmet during the day while the retroreflective layer underneath still fires headlight beams straight back at night. On paper, this is a materially different engineering approach than the plain silver tape earlier in this list, not just a colour swap — the tint has to be precisely thin enough to stay reflective while still reading as black to the naked eye.
This is squarely aimed at riders who refuse anything that compromises their helmet’s daytime look, and the manufacturer backs it with a multi-year outdoor durability claim. Aggregated reviews consistently cite the stealth daytime appearance as the deciding factor over cheaper silver alternatives; a recurring caveat is that scuffs and edge wear show up more visibly against black film than they would on silver tape, since any lifted or worn spot exposes lighter material underneath.
Pros:
- ✅ Stays cosmetically black in daylight conditions
- ✅ Genuine 3M reflective base material underneath
- ✅ Combo shape variety suits full-face and half helmets
Cons:
- ❌ Priced well above plain silver reflective tape
- ❌ Scuffs and edge wear are more visually obvious
Priced around C$25-35, it’s a premium ask, but it’s the only product here purpose-built for riders who want to reflect at night without looking reflective at noon.
Practical Usage Guide: Reflective Decal Placement and Application
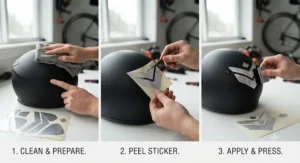
Getting the material right is half the job — reflective decal placement determines whether any of these products actually earn their keep. Start with the surface: wipe the helmet shell down with isopropyl alcohol and let it dry completely, since any leftover wax, sunscreen residue, or dust will undercut adhesion within weeks, not years. Apply in a room around 20°C (68°F); cold application is the single most common reason decals lift within the first month, because the adhesive doesn’t properly bond below roughly 10°C.
For placement itself, prioritize the rear and both sides of the shell over the top — headlights approach from behind and beside far more often than directly overhead, so that’s where reflective decal placement earns its value. Motorcyclists specifically benefit from covering the lower rear third of a full-face shell, since that’s roughly at a following car’s headlight height. Press each piece from the centre outward to push out air bubbles, and run a fingernail or credit card edge along the perimeter of every piece — lifted corners are where water gets in and peeling starts. Give everything 24 hours before riding in rain, and avoid direct contact with gasoline or strong solvents near motorcycle tank areas, since some adhesive backings aren’t rated for fuel exposure.
Real-World Scenarios: Matching Riders to the Right Reflective Helmet Stickers
Picture three different riders and the calculus changes completely. First, a university student commuting 6 km each way on a hybrid bike through campus bike lanes, budget-conscious and riding maybe three evenings a week in low light — the RydeSafe Hexagon Kit – Large or 3M Scotchlite Reflective Tape Roll covers this perfectly, since the priority is broad, cheap coverage rather than aesthetics.
Second, a motorcycle commuter doing 40 km of highway riding daily into a Toronto or Vancouver core, wearing an all-black full-face helmet they genuinely care about the look of — this is exactly the buyer ELOS Combo Style Reflective Stickers was built for, since the daytime stealth factor removes the one objection that would otherwise stop them from adding reflective material at all. Third, a rural rider or farm worker who already has a box of hard-hat stickers on-site and just wants functional off-angle visibility on a bike helmet for occasional evening rides — the MyHardHatStickers Silver Retro-Reflective Strips solves this with zero extra purchase needed, trading style for pure function. Matching the product to the actual riding pattern, rather than just picking the cheapest option, is what makes reflective helmet stickers worth the fifteen minutes of install time.
Problem → Solution: Fixing the Most Common Application Mistakes
Problem: decals peeling at the edges within weeks. This is almost always a surface-prep or temperature issue rather than a bad product — re-clean with isopropyl alcohol, apply above 15°C, and press firmly along every edge with a card.
Problem: stickers look bulky or “aftermarket” on a vented helmet. Switch from large single decals to smaller die-cut shapes like the hexagons in RydeSafe Hexagon Kit – Large or LOOM Mega Reflective Sticker Set (101pc), which flex around vents instead of bridging over them.
Problem: reflective coverage disappears at intersections despite decals on the rear. This is a placement issue, not a product failure — add coverage to the sides of the shell, not just the back, since cross-traffic headlights hit from an angle the rear-only setup can’t catch.
Problem: reflective material looks out of place on an all-black motorcycle helmet. This is precisely the gap ELOS Combo Style Reflective Stickers was designed to close with its black-until-lit finish, rather than fighting the aesthetic with silver tape.
Problem: decals won’t hold on a rough, matte-textured shell. Raw tape like the 3M Scotchlite Reflective Tape Roll typically holds better on textured finishes than rigid precut shapes, since it can be cut to size and pressed flat with more surface contact.
How to Choose Reflective Helmet Stickers
- Confirm your helmet material first. ABS and polycarbonate shells accept adhesive differently than fibreglass or carbon — check compatibility before buying (more on this below).
- Match coverage to your riding pattern. Mostly urban night commuting favours broad, cheap coverage; occasional highway riding favours targeted, angle-optimized placement.
- Decide between DIY tape and a precut kit. Raw tape wins on irregular shells and cost-per-square-inch; a kit wins on speed and consistency.
- Weigh daytime appearance against pure function. If you care how the helmet looks parked at a café, a stealth product like ELOS Combo Style Reflective Stickers earns its premium.
- Check the reflective material type. Glass-bead film and prismatic film both work, but prismatic (like Reflexite) tends to perform better at sharp viewing angles.
- Factor in Canadian weather. Look for waterproof, UV-stable ratings — freeze-thaw cycles and long summer sun exposure both stress cheap adhesives.
- Buy slightly more material than you think you need. Trimming errors are common on a first application, and extra pieces cost far less than reordering later.
Helmet Shell Material Compatibility: ABS, Polycarbonate, Fibreglass, and Carbon
Helmet shell material compatibility is the part of this decision most buyers skip entirely, and it’s genuinely consequential. ABS plastic — the most common shell material on budget and mid-range bike helmets — is relatively porous and forgiving, and accepts most pressure-sensitive adhesives without issue. Polycarbonate, used on many lightweight commuter and road helmets, is smoother and harder, which means adhesion is initially strong but any solvent-based cleaners (rather than simple isopropyl alcohol) can cause micro-crazing, a network of tiny surface cracks that weakens the shell over time — a real reason to avoid strong cleaning agents before applying decals.
Fibreglass and carbon-fibre shells, common on premium motorcycle helmets, typically have a clear-coat finish similar to automotive paint, and generally accept reflective decals well provided the coat is fully cured and free of wax-based protectants. The one universal rule across all four materials: never apply reflective decals over stickers, paint, or graphics that are already lifting, since you’re just adding weight to an already-failing bond. When manufacturers list helmet certification requirements — DOT, ECE, or Snell for motorcycle helmets — none of them prohibit adding external reflective decals, since these certifications test impact performance rather than surface finishes, but it’s still worth confirming your specific helmet’s warranty terms before making shell modifications.
Reflective Helmet Decal Kits vs Custom Reflective Helmet Graphics
Reflective helmet decal kits — the precut, shape-based products like RydeSafe Hexagon Kit – Large or Bright Knight Decals Helmet Hexagon Kit — trade a bit of individuality for speed and consistency. You open the pack, peel, and place; the shapes are already engineered for helmet curvature, and the reflective performance is validated by the manufacturer as a complete system. Custom reflective helmet graphics, on the other hand, usually mean either cutting your own patterns from a raw material like the 3M Scotchlite Reflective Tape Roll, or ordering a personalized cut design from a specialty vinyl shop.
The trade-off is genuinely simple: decal kits are faster and more forgiving for a first-timer, while custom graphics let you match a specific paint scheme, add initials, or wrap an unusually shaped shell that no off-the-shelf kit fits well. Neither approach is objectively better — a rider outfitting five family bikes before a group ride will get more value per minute from a kit, while someone customizing a single showpiece motorcycle helmet will get more value from a custom cut, even if it takes an extra evening of planning.
Motorcycle Helmet Visibility Upgrade: What Actually Works for Riders
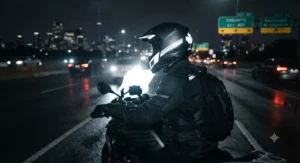
A genuine motorcycle helmet visibility upgrade goes beyond just slapping a decal on the back. Motorcycles are struck from the side in intersection collisions far more often than bikes are, which shifts the priority toward side-panel coverage rather than rear-only placement. Riders should also think in layers: reflective decals on the helmet work best alongside reflective strips on riding jackets and panniers, since a driver’s attention is drawn to the largest moving reflective mass first, not necessarily the helmet alone.
For riders logging real highway kilometres, the Bright Knight Decals Helmet Hexagon Kit or ELOS Combo Style Reflective Stickers both make sense as purpose-built options, since generic bike-oriented kits weren’t necessarily engineered with the wind-load and vibration a motorcycle shell experiences at highway speed in mind — although in practice, pressure-sensitive adhesive rated for outdoor exposure tends to hold up fine either way. What actually moves the needle most is simply having any reflective coverage at all in the right position — this is squarely a case where the incremental upgrade from a C$20 kit outweighs almost any other single safety purchase at that price point.
Visibility Angle Coverage: What the Spec Sheet Won’t Tell You
Visibility angle coverage is the single most misunderstood spec on this entire product category, mostly because manufacturers rarely explain it clearly. A reflective material’s “angularity” describes how well it keeps reflecting light back to the source as the angle between the light and the observer increases — in plain terms, how well it performs when a car’s headlights aren’t hitting you dead-on. Most real-world close calls happen at exactly these off-angle moments: a car turning left across your path, or merging beside you at an intersection.
| Material Type | Off-Angle Performance | Found In |
|---|---|---|
| Glass-bead reflective film | Moderate | RydeSafe, 3M Scotchlite Tape, Salzmann, LOOM, Bright Knight |
| Prismatic (microprism) film | Strong | MyHardHatStickers Silver Retro-Reflective Strips |
| Black-tinted reflective film | Moderate (reduced by tint layer) | ELOS Combo Style Reflective Stickers |
Reading this table plainly: if angle coverage at intersections is your top priority over anything else, prismatic material like the one used in MyHardHatStickers Silver Retro-Reflective Strips technically wins on paper, but that doesn’t make glass-bead film a poor choice — for most straight-line commuting where you’re primarily being approached from directly behind, the difference is far less consequential than simply having any reflective coverage in the first place.
Common Mistakes When Buying Reflective Helmet Stickers
The most frequent mistake is buying based on price alone and ending up with unbranded, uncertified vinyl of unknown reflective quality — a decal that looks shiny under a flashlight in a store can still perform poorly at real headlight distance and angle. A related error is assuming more coverage always equals more safety; a helmet plastered edge-to-edge with reflective material but with none of it positioned at side or rear-facing angles provides less real protection than a modest, well-placed kit. Buyers also frequently skip surface prep entirely, then blame the product when decals lift within a month — as covered above, this is almost always fixable with proper cleaning and application temperature.
One more overlooked issue: colour choice matters less than people assume for reflective performance specifically, since the retroreflective mechanism works the same regardless of the visible tint, but it does matter enormously for daytime aesthetics and rider willingness to actually use the product. Research on cyclist safety equipment in two major Canadian cities found that visibility-aid use varied significantly by rider demographics and trip conditions, reinforcing that the “best” product is the one a rider will actually keep on their helmet rather than remove because they dislike the look.
Long-Term Cost & Maintenance
Reflective helmet stickers are refreshingly low-maintenance compared to most safety gear, but they aren’t permanent. Most manufacturers rate their films for multi-year outdoor durability, though Canadian conditions — freeze-thaw cycles, road salt spray, and long summer UV exposure — tend to shorten that window somewhat compared to milder climates. A simple annual check works well: run a fingernail along every decal edge each spring, and replace any piece showing lifted corners, cracking, or visibly faded colour before it fails entirely.
| Product | Price Range | Typical Reapplication Interval |
|---|---|---|
| 3M Scotchlite Reflective Tape Roll | C$10-15 | 2-4 years |
| RydeSafe Hexagon Kit – Large | C$15-20 | 3-5 years |
| Salzmann Hi-Vis Reflective Stickers | C$15-20 | 3-4 years |
| LOOM Mega Reflective Sticker Set (101pc) | C$20-25 | 3-5 years |
| Bright Knight Decals Helmet Hexagon Kit | C$18-25 | 3-5 years |
| ELOS Combo Style Reflective Stickers | C$25-35 | 3-6 years |
Looking at the total cost of ownership rather than the sticker price alone, even the priciest option here works out to well under C$10 per year of use — a genuinely trivial cost against the actual safety benefit, and far cheaper over five years than a single replacement helmet light or a taxi ride home after dark because you didn’t feel safe riding.
Frequently Asked Questions
❓ Do reflective helmet stickers actually work?
❓ Are reflective helmet stickers legal on a certified motorcycle helmet in Canada?
❓ How long do reflective helmet decals last outdoors?
❓ Can I apply reflective stickers to a matte-finish helmet?
❓ What's the difference between reflective and fluorescent hi-vis stickers?
Conclusion
Reflective helmet stickers sit in a rare category of safety gear that’s genuinely cheap, genuinely fast to install, and genuinely effective — there’s very little reason not to have some on your helmet if you ever ride in low light. For most Canadian commuters, RydeSafe Hexagon Kit – Large hits the sweet spot of price, coverage, and ease of application, while budget-focused riders or anyone outfitting multiple helmets should look hard at the 3M Scotchlite Reflective Tape Roll. Motorcyclists who care about daytime looks have a genuinely purpose-built option now in ELOS Combo Style Reflective Stickers, and anyone prioritizing off-angle visibility at intersections should give MyHardHatStickers Silver Retro-Reflective Strips a serious look.
Whatever you land on, the real lesson from this whole comparison is that placement and application matter almost as much as the product itself — a C$15 kit installed properly on the sides and rear of a helmet will outperform a C$35 kit slapped only on top. Provincial authorities like Alberta’s motorcycle safety guidance make clear that certified helmets are the baseline requirement, and reflective decals are simply the smart, low-cost layer on top of that baseline. Fifteen minutes with a clean shell and a bit of patience is a small price for being seen.
Recommended for You
- Hi-Vis Rain Jacket for Motorcycle Commuting: 7 Picks (2026)
- 7 Best Reflective Vests for Motorcycle Riders in Canada (2026)
- Hi-Vis Vest vs Reflective Vest for Motorcyclists: 7 Picks (2026)
Disclaimer: This article contains affiliate links. As an Amazon Associate, I earn from qualifying purchases. If you purchase products through these links, we may earn a small commission at no additional cost to you.
✨ Found this helpful? Share it with a friend who rides after dark! 💬🤗
